Using Jaw Viewer
View and measure a scan
Start with one scan open. Use View to look around, then Measure when you want to place points or get a number.
Find your way around
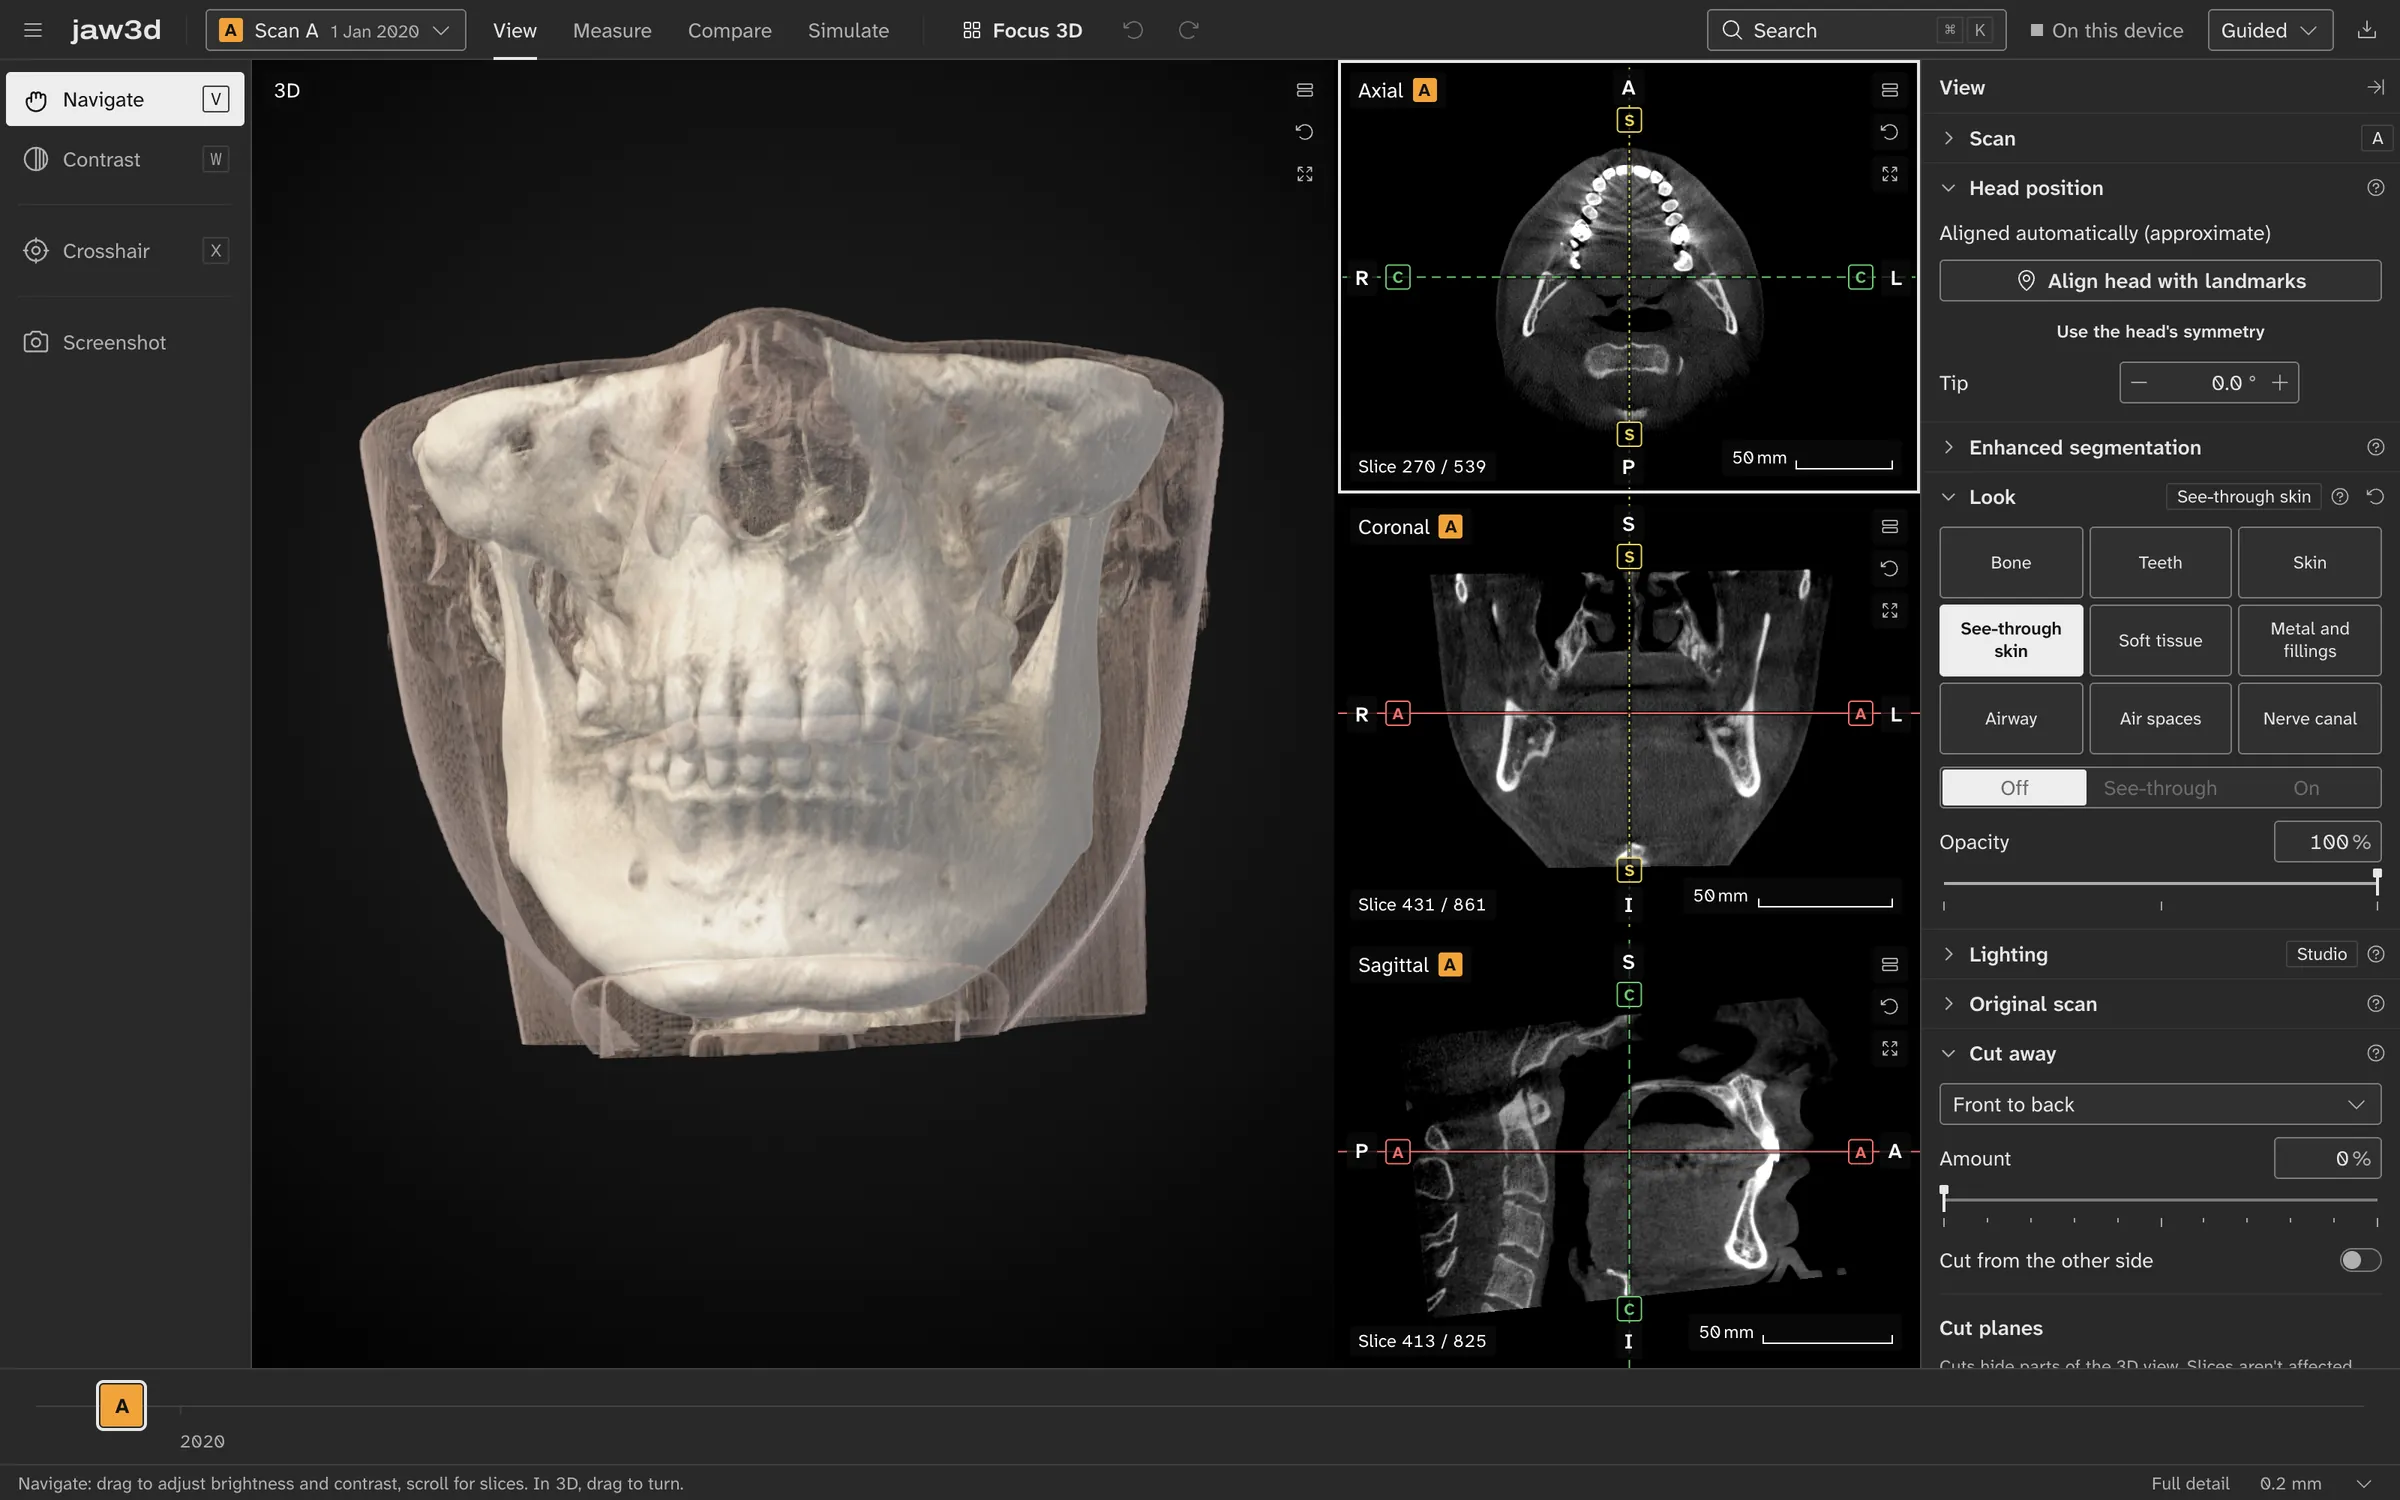
- 3D view: turn the skull and change the visible surface.
- Slice views: inspect a point from different directions.
- Look controls: choose bone, teeth, skin and the air spaces.
- In Library, open your scan and choose View.
- Drag inside the 3D view to turn it. The view controls take you back to a standard direction.
- Use Look to choose what is visible: bone, teeth, skin, see-through skin, soft tissue or air spaces.
- Pick another layout when you need more room. Changing the view never edits the scan.
Open Controls and shortcuts in the viewer menu for the current mouse, trackpad and keyboard controls.
Read the slices together
Axial looks through the scan from above, coronal from the front, sagittal from the side. The letters in the corners give the patient's directions.
- Focus a slice view and scroll to move through it.
- Click a point to place the crosshair, then find that point in the other views.
- Use the brightness and contrast controls or a preset when an edge is hard to see.
A 3D surface is drawn from the scan. Check a point in the slices before you measure on it.
Place a measurement
- Choose Measure and select Distance.
- Place the first point, then the second. Check both in the other views.
- For an angle, choose Angle and place three points, the middle one at the vertex.
- Read the result in the measurement list. Undo if you want to place it again.
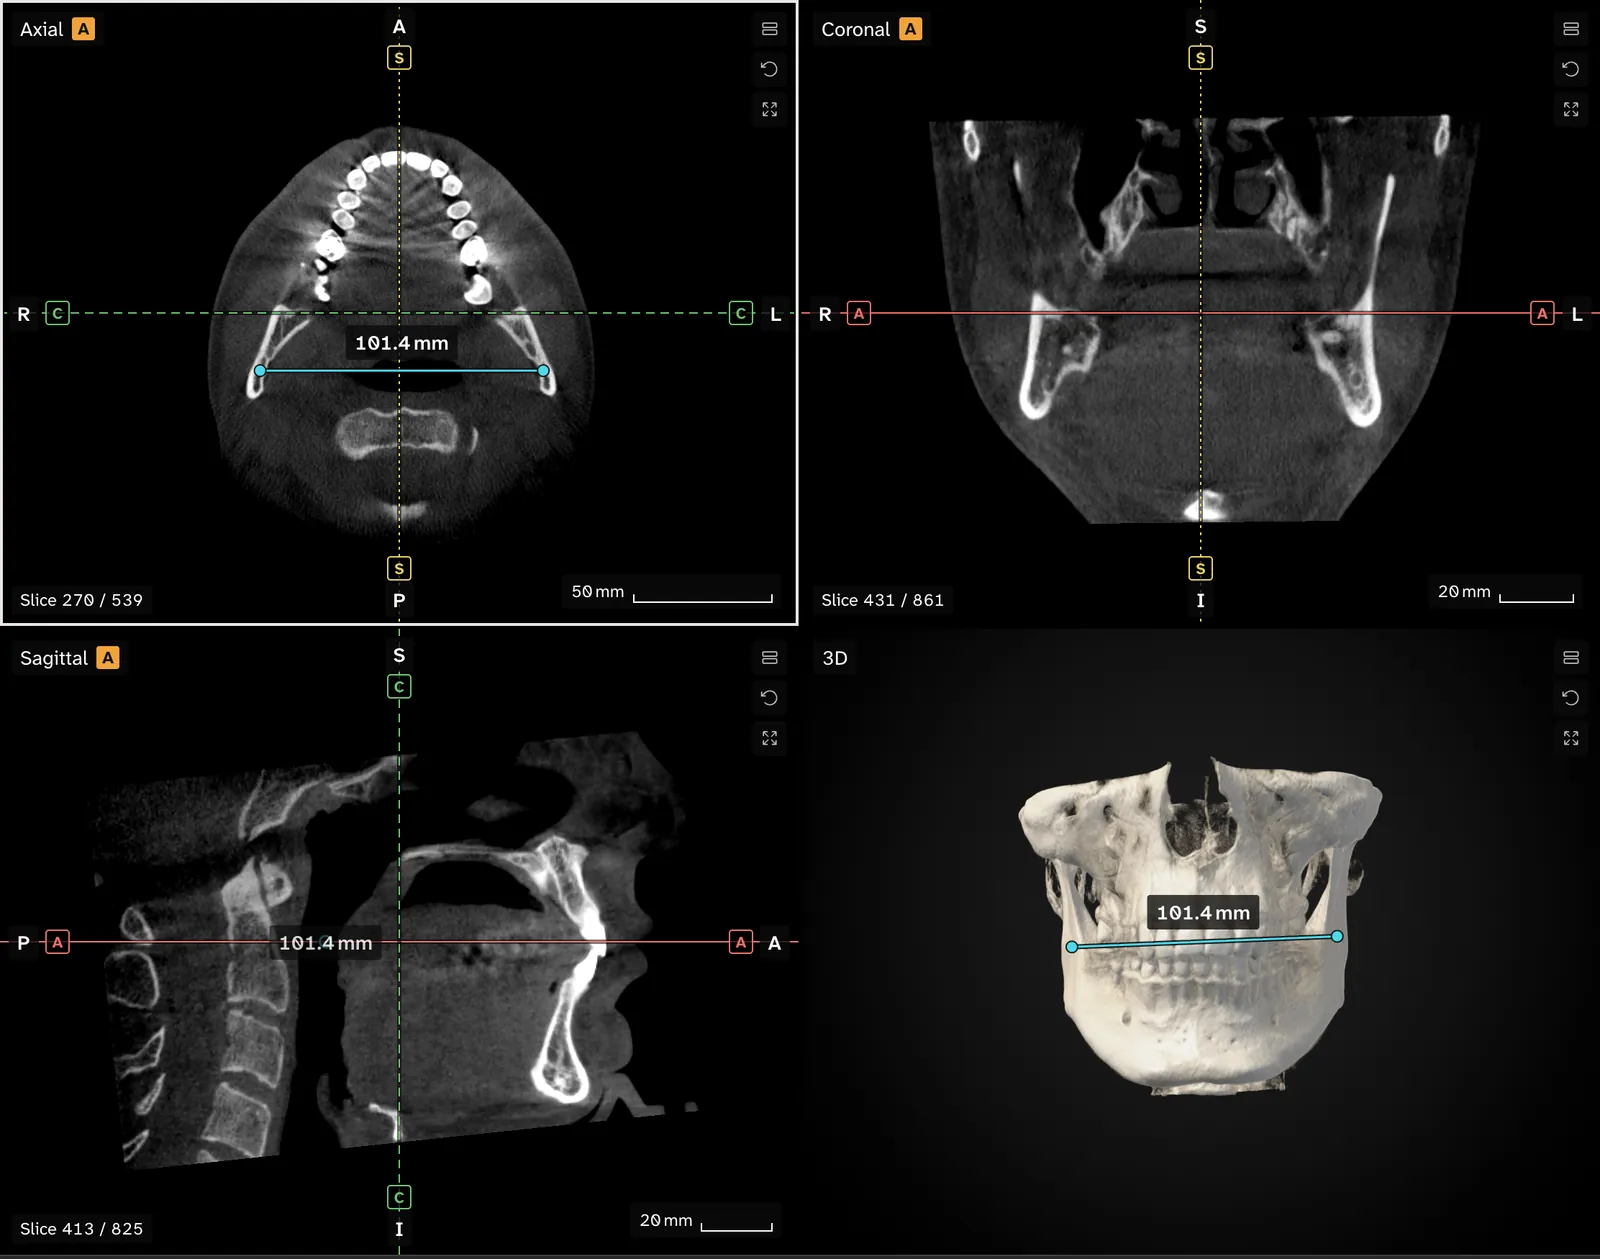
Distances are in millimetres. Their precision depends on the scan and on your points: read what a number on screen can tell you.
Other ways to look closer
- Landmarks and analysis for named points and the angles built from them.
- Airway and sinuses for the air spaces and their volumes.
- Panoramic views for following the dental arch and the nerve canal.
Save a project before you close the tab if you want to keep your measurements.